Bake Modes
Choose between Simple, Advanced, Texture Overlay, and Post Process.Wireframe FX Studio includes 4 bake modes. Choose the mode based on the result you want, not on the number of options shown in the tool.
Simple
Use Simple mode when you want:
- one baked overlay mesh
- one overlay renderer
- the lightest and most direct setup

Simple mode creates:
WireframeStaticBakeAsset- a baked overlay mesh
- optional static runtime setup on the target
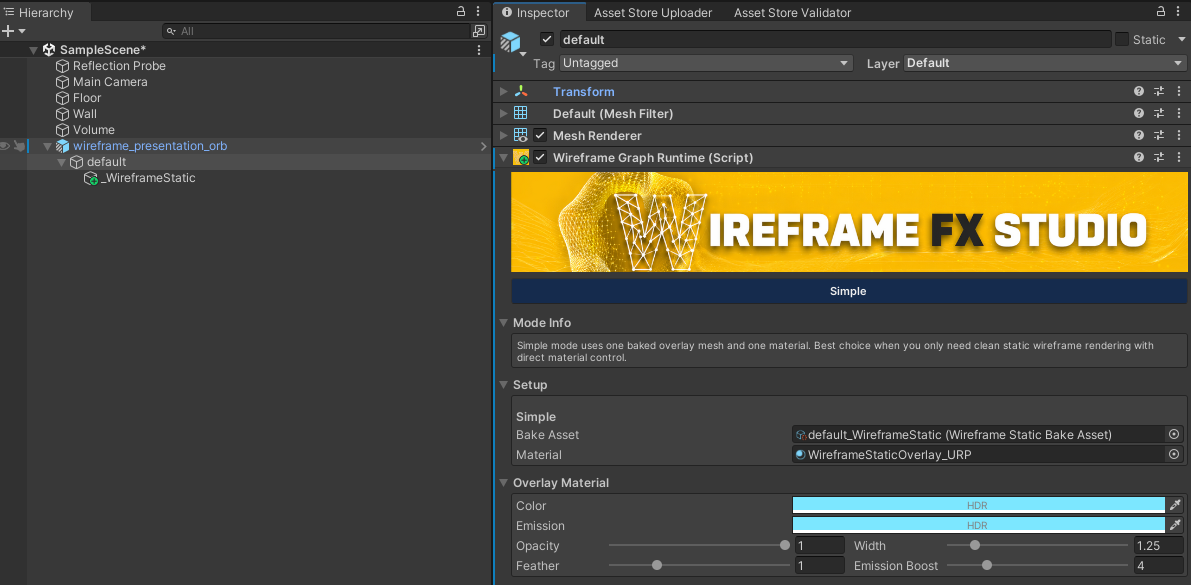
This is the best starting point for first-time setup.
Advanced
Use Advanced mode when you want:
- graph-based wireframe rendering
- separate line and point rendering
- compute-driven animated effects
- a more flexible runtime workflow
Advanced mode creates:
WireframeGraphAsset- a line mesh
- a billboard point mesh
- advanced runtime setup on the target
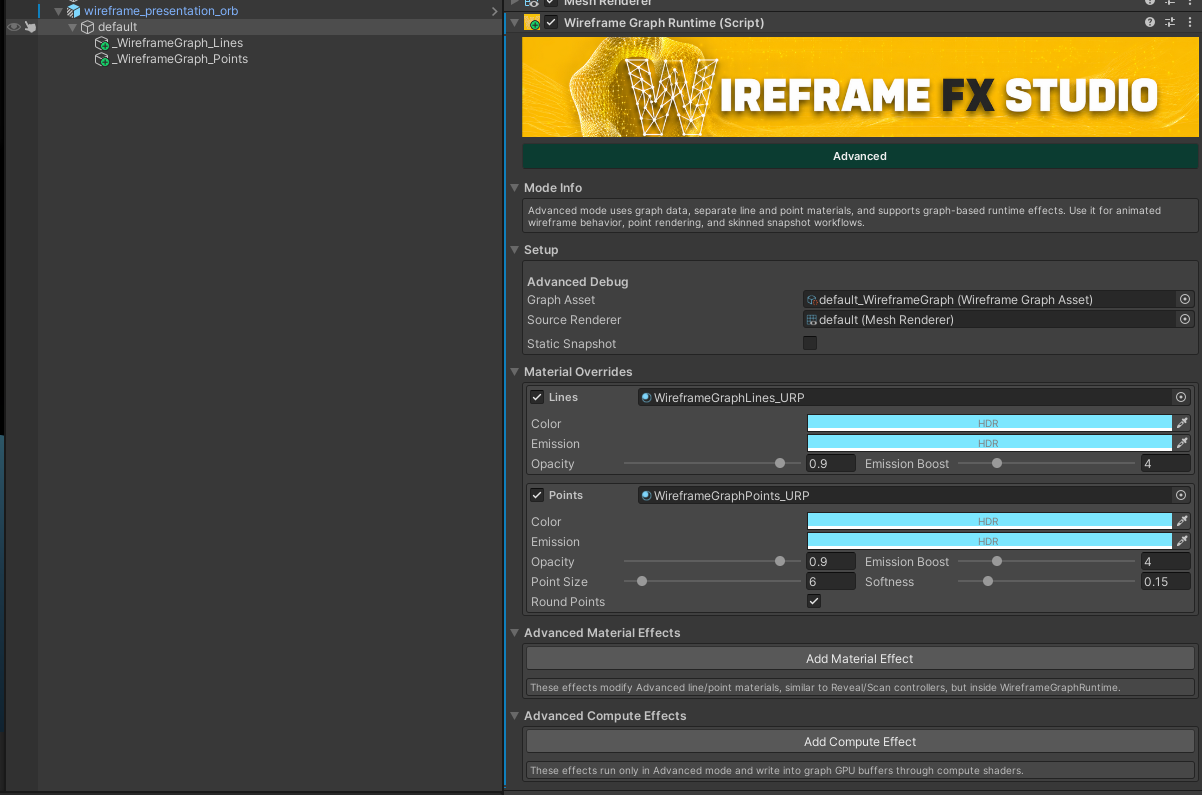
Choose this mode when the look depends on animated GPU effects rather than a simple static overlay.
Texture Overlay
Use Texture Overlay when you want fastest simple Wireframe effect without any animation effects.
Texture Overlay mode creates:
- WireframeTexture
- Wireframe Material
- Wireframe TextureBake Asset
Control before bake :
- Wire thinkness
- Texture Resolution
- Points Size
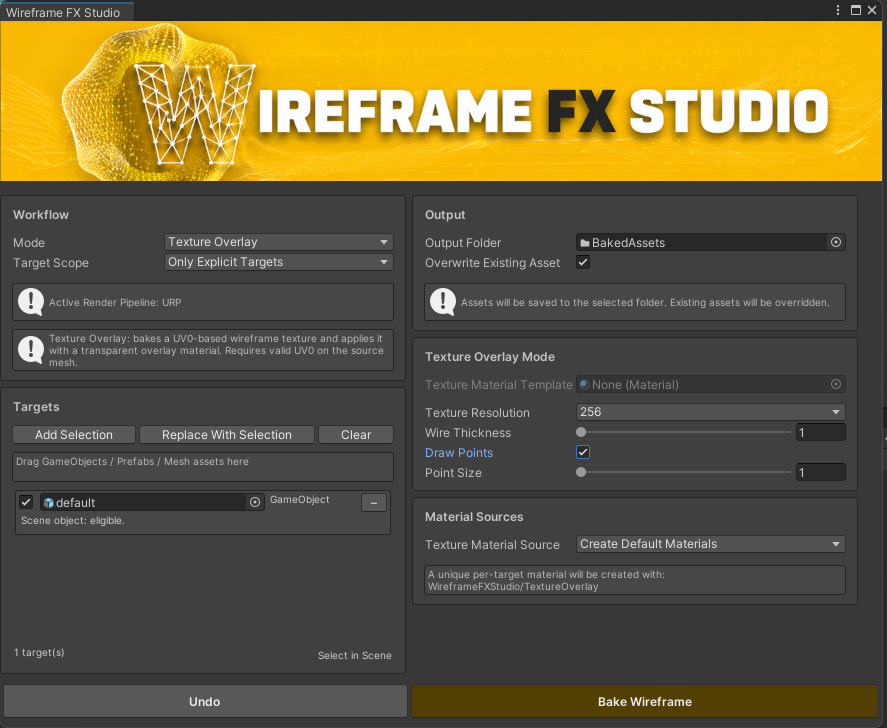
Tip: You can Bake Texture for same GameObject multiple times to achieve needed wireframe look. (It will simply override created asset)
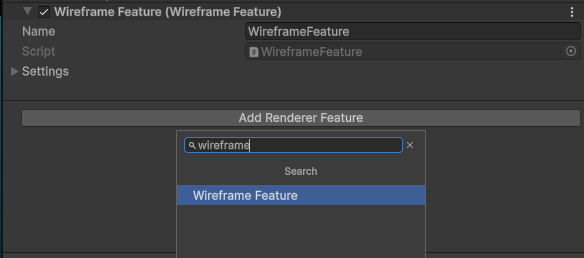
Post Process
Use Post Process when you want a fullscreen per object wireframe without animation effects.
Important note:
- it works well on opaque objects
- transparent objects can be unreliable because they usually do not write depth
To apply wireframe post processing effect:
If you use URP:
Open your current URP Renderer Data Asset Click "Add Render Feature" => Wireframe Feature
After that you will able to add Wireframe to your Post Processing Volume (Add Override=> WireframeFXStudio=>Wireframe)
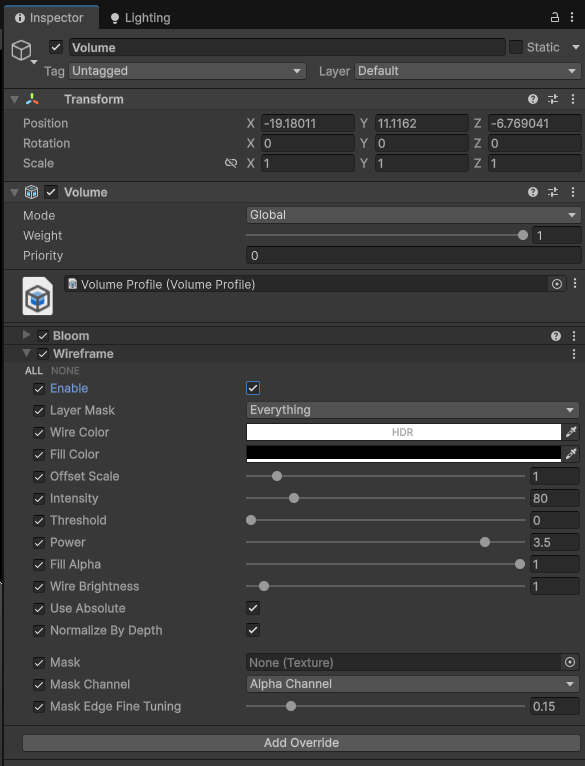
- Tune Wireframe setting
- Apply effects to objects on selected layers
- Maks Wireframe effect with any texture
If you use HDRP:
Create Empty GameObject Add Component => Custom Pass Volume In Custom Passes click + and select Wireframe HDRP Custom Pass
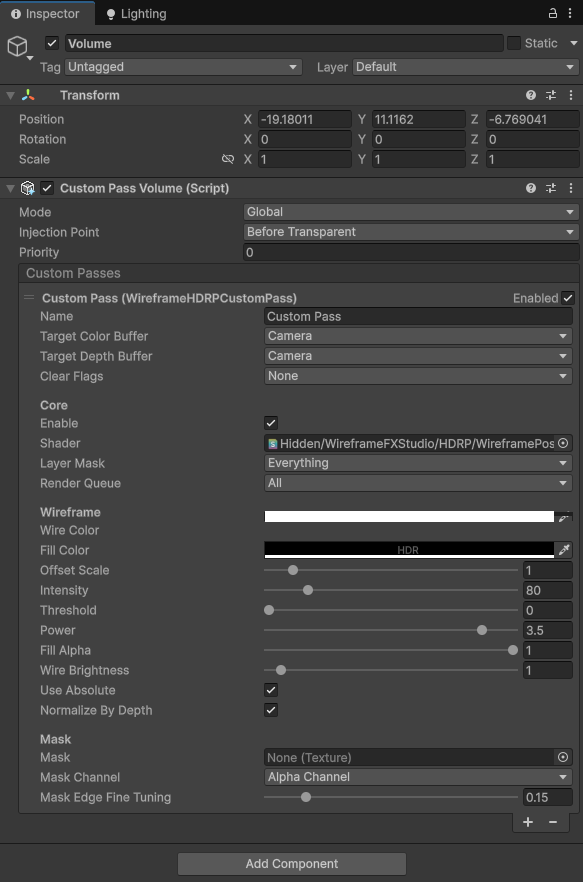
- Tune Wireframe setting
- Apply effects to objects on selected layers
- Maks Wireframe effect with any texture
Which Mode To Pick
- Start with Simple if you want the fastest first result with ability to apply animation effects.
- Use Advanced if you need the compute effects, point/line runtime rendering, or a more expandable setup.
- Use Texture Overlay when you want fastest and simpliest solution
- Use Post Process for fast fullscreen per object wireframe without animation effects.